06
2017-Mar
[Arduino] 아두이노로 GPS(위치) 추적기(GPS Tracker)를 만들어 보았다작성자: 2N IP ADRESS: *.56.204.218 조회 수: 3781
예전에 GPS 모듈 (안테나 포함)을 14,300원(배송비 미포함)에 싸게 파는곳이 있어서
하나 구매 해놓았다가 최근 시험기간 증후군이 도져서 포스팅을 해본다!
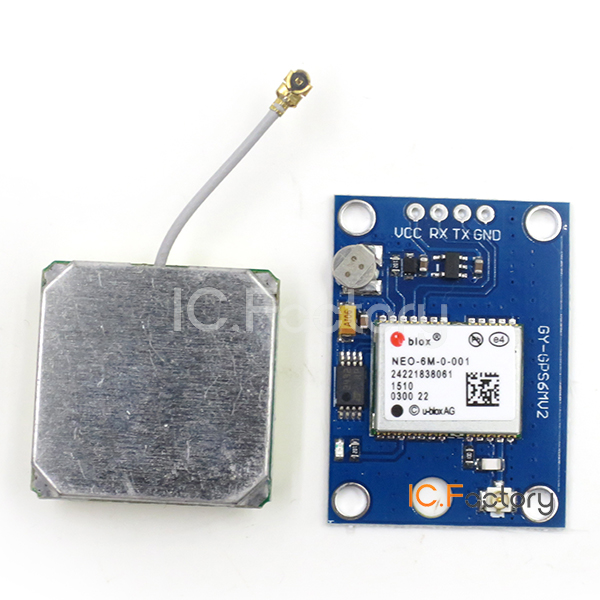 NEO-6M GPS모듈 (ICF-0139) - 14,300원 (http://icfactory.co.kr/shop/goods/goods_view.php?goodsno=314&category=005004 )
준비물은 일단 아두이노와 MicroSD(SD) 카드 모듈, GPS 모듈과 몇 개의 점퍼선 들이 필요하다
(만약 위 사이트에서 GPS 모듈을 구입시 모듈에 납땜을 해야하는 상황이 벌어질 수 있다)
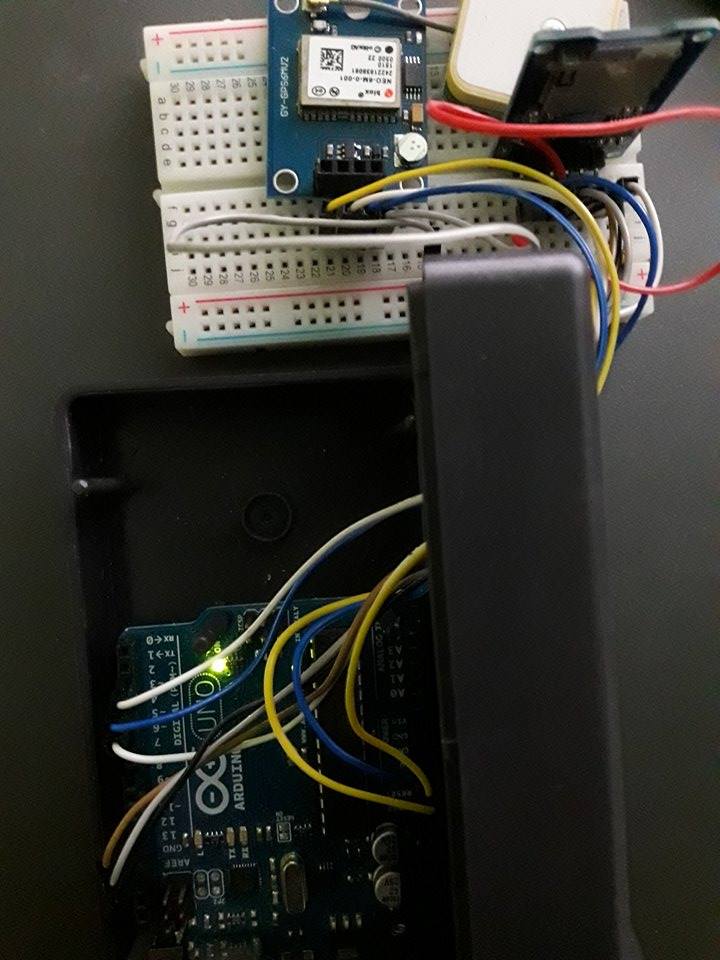 회로도 완성본
위와 같은 회로도로 하드웨어를 구성하면 된다
이제 소스코드만 업로드 하면 된다
TinyGPS.zip 은 위성에서 받은 GPS 데이터를 파싱할때 쓰이는 라이브러리 이고
GPS_Tracker.ino.zip 는 아래 코드들을 ino파일로 저장한것이다
// 제작자 : 2N(nms200299)
// 설명 : GPS위성에서 수신한 데이터를 파싱하여
// MicroSD(SD) 카드에 GPX 파일의 형식으로 기록
#include <SoftwareSerial.h>
#include <TinyGPS.h>
#include <SPI.h>
#include <SD.h>
TinyGPS gps;
SoftwareSerial uart_gps(2, 3); // RX = 3 , TX = 2
void getgps(TinyGPS &gps);
File myFile;
void setup() {
Serial.begin(9600);
uart_gps.begin(9600);
if (!SD.begin(4)) {
return;
}
}
void loop() {
while(uart_gps.available()){
int c = uart_gps.read();
if(gps.encode(c)){
GetGPS(gps);
// GPS 신호가 잡히면 GetGPS 함수 호출
}
}
}
void GetGPS(TinyGPS &gps) {
int year;
byte month, day, hour, minute, second, hundredths;
float latitude, longitude;
// 년도, 월, 날짜, 시, 분, 초, 위도, 경도 등을
// 저장할 변수 선언
gps.f_get_position(&latitude, &longitude);
// 위도, 경도를 파싱하여 변수에 저장
gps.crack_datetime(&year,&month,&day,&hour,&minute,&second,&hundredths);
// 년도, 월, 날짜, 시, 분, 초를 파싱하여 변수에 저장
hour = hour + 9;
// 한국의 시간은 GMT+9 이므로 시간에 9시간을 더한다
if (hour > 24){
hour = hour - 24;
day = day + 1
}
// 계산한 시간의 값이 24를 초과 했다면
// 시간 값에서 24를 빼고
// 날짜 값에서 1을 더한다
myFile = SD.open("GPS_TEMP.txt", FILE_WRITE);
// 파일을 쓰기모드로 연다
if (myFile) {
myFile.print(" <trkpt lat=\"");
myFile.print(latitude,6);
myFile.print("\" lon=\"");
myFile.print(longitude,6);
myFile.println("\">");
myFile.println(" <ele></ele>");
myFile.print(" <time>");
myFile.print(year);
myFile.print("-");
myFile.print(month);
myFile.print("-");
myFile.print(day);
myFile.print("T");
myFile.print(hour);
myFile.print(minute < 10 ? ":0":":");
myFile.print(minute);
myFile.print(second < 10 ? ":0":":");
myFile.print(second);
myFile.println("Z</time>");
myFile.println(" </trkpt>");
myFile.close();
// GPX파일 형식으로 파일을 쓴다
Serial.println("Success!");
} else {
Serial.println("Fail...");
}
delay(5000);
}
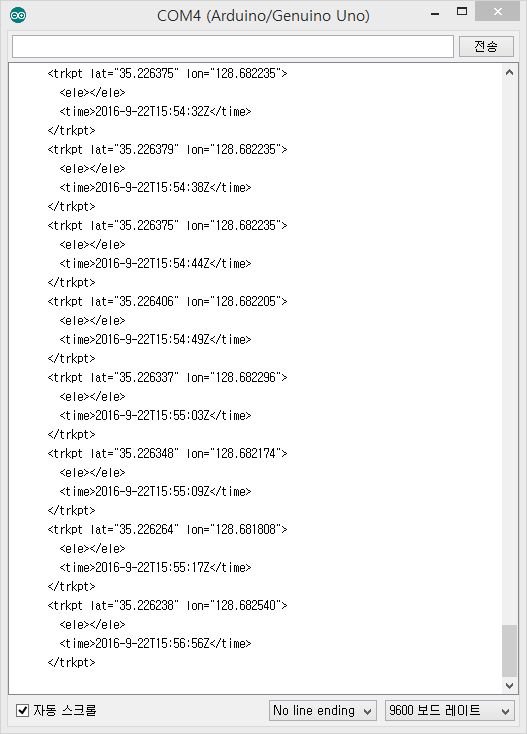
이제 이 아두이노로 만든 GPS 추적기(GPS Tracker)가 제대로 작동하는지 확인 하여보자!
일단 하늘이 보이는 장소에 가서 GPS(위치) 추적기를 키고 한 3분~5분 정도 돌아다니고 나서
GPS_TEMP.txt 를 열어보면 아래 사진과 비슷한 형식의 코드가 있을것이다.
.GPX 파일을 만들고
이런 형식으로 저장하면 GPX 파일이 완성된다!
<?xml version="1.0" encoding="UTF-8"?>
<gpx xmlns="http://www.topografix.com/GPX/1/1"
xmlns:xalan="http://xml.apache.org/xalan" xmlns:xsi="http://www.w3.org/2001/XMLSchema-instance"
creator="MotionX Live" version="1.1">
<trk>
<name>GPS_Temp</name>
<desc></desc>
<trkseg>
[GPS_TEMP.txt 에서 읽어온 코드]
</trkseg>
</trk>
</gpx>
<gpx xmlns="http://www.topografix.com/GPX/1/1"
xmlns:xalan="http://xml.apache.org/xalan" xmlns:xsi="http://www.w3.org/2001/XMLSchema-instance"
creator="MotionX Live" version="1.1">
<trk>
<name>GPS_Temp</name>
<desc></desc>
<trkseg>
[GPS_TEMP.txt 에서 읽어온 코드]
</trkseg>
</trk>
</gpx>
GPX 파일은 어떻게 하면 볼 수 있을까?
Google Earth 라는 프로그램을 설치하면 입체적으로 볼 수 있게 된다
https://www.google.com/earth/
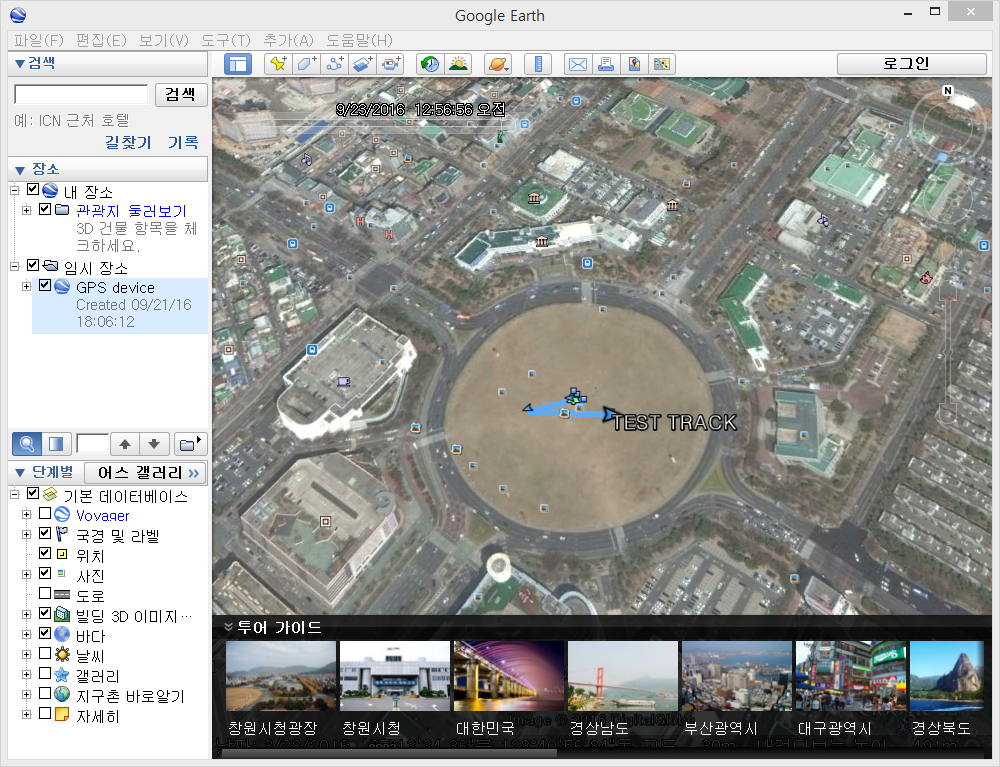 창원광장에서 GPS (위치) 추적기를 들고 이동한 방향이 로그에 찍혀 있다
정확히 잘 작동 한다!

 Blonix
감사감사..
그리고 스크랩할때 굳이 쓰기모드로 들어가서 복사하지 말고 게시글을 통째로 스크랩하면 알아서 html 구성까지 복붙되기땜에 엑박염려도 없고 편리하답니다. 본 게시글은 수정해둠..